Reader Questions: Eric's Knee-Operated 15-91

All photos in this entry by Eric from Ottawa

Eric from Ottawa writes,

[The 15-91 I recently acquired] looks like it's in great shape, but it doesn't run. It has a knee switch rather than a foot pedal and it looks like the motor controller has failed. 

To test it, I unscrewed the center of the flywheel so there was no load and plugged it in and got nowhere, even with the knee switch in and fully engaged.

Do you think it's worth re-wiring it to use a standard foot pedal like most of the ones I've seen?


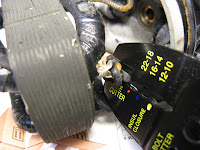
Hi Eric, first off, a little about your machine. The chrome rim on the handwheel plus the design on the faceplate, from the little bit of it that we can see in the photo up top, indicate this machine is from the 1930s or early 1940s (assuming those parts are original). The old-school cylindrical Singerlight visible in the photo below also indicates the machine is from that era.


The “J-“ prefix on the serial number plate indicates your machine was made in Singer’s Canadian plant in Quebec.


Secondly, good on you for trying to run the motor with no load, that’s exactly the correct first step to test out a motor.


As you’ve observed, your machine uses a knee-activated controller.
 

For those readers unfamiliar with this device, it was an early alternative to the foot pedal most of us know, and it eventually fell out of favor. It consisted of a motor controller placed in the right side of the wooden base:


The end of the removeable knee lever--which stows handily inside the case and underneath the machine, or occasionally up in the domed lid via clasps, when not in use--“plugs” into the hole in the front of the case.


Pressing against the lever would activate the motor controller, which is wired into the inside of the three-pin terminal.

Eric, there are three possibilities here: 1) The power cable is faulty. 2) The motor controller is faulty. 3) The potted motor itself is faulty. Hopefully it is #1 or #2 and not #3, as the first two are easy, relatively inexpensive fixes.

To see if it’s the power cable, try turning the light on. That’s not a 100% accurate test because the bulb may be burnt out, but at the very least, if the light does turn on you know there’s power flowing through the cable. Another thing you can do is bring your cable to the house of a friend with a vintage Singer--that cable will fit a variety of machines made in the 1930s, ‘40s, ‘50s and some in the ‘60s--and see if it powers his/her machine okay. If you determine your cable is what’s faulty, you can order a replacement from Sew-Classic for US $7.95 right here. If you choose to go with a different supplier, perhaps someone local to you in Canada, note that you’re looking for a “single-lead” (as opposed to “double-lead”) cable.

If the motor controller is the problem, it is totally “worth re-wiring it to use a standard foot pedal,” to answer that question, and the good news is that it doesn’t quite require “re-wiring.” The motor controller leads are easily removed via two thumbscrews inside the three-pin terminal. There’s no cutting of wire or soldering required, it’s a simple mechanical connection. To see how to remove the leads, click here and look at the parts of the entry that pertain to removing the two motor leads, which in your case are really the controller leads. Be sure to note which two pins in the terminal those leads connect to.

To replace your motor controller with a foot pedal, you’ll need to spend a tad more. You’ll need to buy a foot controller; the least expensive offered by my preferred supplier, Sew-Classic again, goes for US $11.95.

What you can do is connect the two leads from your new foot pedal to the same two posts that you disconnected the original motor controller leads from. Then you can remove the old motor controller (attached via screws) from that compartment on the right of the wooden base, and store the pedal there.

Alternatively, if you’d like an original Singer foot pedal, you can check eBay.

If it’s the motor that’s bad, then you’ve got a fair amount of work ahead of you to figure out what exactly is wrong with it, and if it’s fixable. You may want to browse the complete “How to Re-Wire a Potted Motor” to determine how to disassemble the motor so that you can inspect the wiring, one possible culprit. But if it’s something beyond bad wiring--a burnt-out field core, for example--that’s beyond the range of my fix-it knowledge.

If you do determine the potted motor is what’s faulty, you will occasionally spot someone selling one on eBay.

Whatever you do, please don’t throw that motor controller out, even if you determine it’s bad; if you stay in this hobby long enough, you will eventually encounter someone else who may need a part from that controller--even if it’s just a single screw--so you may be able to help them rescue an otherwise non-functioning machine. Ditto with the knee lever.

Best of luck with it, congrats on the machine--I love those chrome-rimmed handwheels!--and let us all know how it turns out.

Condition Chart for Your Featherweight

========================================

CONDITION CHART

========================================

From: Graham Forsdyke (graham@singer-featherweight.com)
Subject: Condition chart

Yes I believe that a system of determining condition is a great asset.
I devised one for ISMACS so that members could describe their
machines in correspondence. The following is a down load of a page that we send
out as part of a starter kit to new ISMACS members:

Condition chart


Graham Forsdyke's chart is now universally used to determine machine condition,
so that when machines are described among collectors, in member's advertisements
and in the auction reports, we can all have some better idea of the state of the
items than good, very good or poor. This scale takes no notice of mechanical condition.


If something is broken or missing this should be stated, not hidden behind a number.

10: Just like the day it left the factory. Not a scratch or mark upon it. I
think I have every seen only two machines in this category.
9: As 10 but with the small, odd scratch or wear mark evident to very close
inspection.
8: Very good used condition. All paint good; all metalwork bright. What the
average antique dealer would call "perfect".
7: Good condition but rubbing of paint evident and some nickel plating worn.
6: As in 7 but more wear to paint and some surface rust to the bright work.
5: The average, hard-used, ill-cared-for machine looking for someone to love it.
4: Poor condition, chipped enamel, rusty metalwork but acceptable for a
collection if a rare machine.
3: In need of restoration but a reasonable job for a dedicated enthusiast.
2: Total restoration needed to paintwork and bright metal. It's a brave
collector that takes it on.
1: Spare parts only and these would be in need of extensive restoration.

This system seems to have worked well over the past 10 years and I commend it to
members.

Hans and the Singer 206, Part 2


Here's Part 2 of Hans from Chicago's questions about his Singer 206.

Is there any type of regular maintenance a 206 requires (oiling?) to care for them?
Of course. Every vintage Singer requires regular oiling at a minimum (click here to learn how to oil your machine), and I always check the wiring and the motor for safety’s sake. You'll also want to check that the belt is properly adjusted.

This machine came with a needle, bobbin and bobbin case, so I believe it is operable. Are there other attachments that are needed/beneficial?
Needed or beneficial for what? Please understand it is impossible to answer vague questions like this.

I have read this machine uses an unusual needle (206x13) and using the wrong one will nick up the bobbin case.


That’s absolutely true, a 15x1 needle should not be used on this machine. The 206x13 needle is a bit more expensive than the more common 15x1 needles used by model 15s, 201s, 221s et cetera. For that reason, some people muck with the timing on the 206 (and related 306) to use the 15x1 needle, but based on what I’ve read from those more experienced than I, this is not a good idea and ought not be done.

For your edification on this topic, I recommend you join the Vintage Singers Yahoo Group and search through the archives to read up on it. I do not recommend you pose questions to the group on that topic until you have read through the archives, as it has already been discussed to death; many of the kind and knowledgeable folks on the forum have dedicated much of their time to explaining it, and I think it would be inconsiderate to ask them to repeat themselves.

Do you know of a good supplier for these needles?
There are tons of suppliers, but I haven’t ordered enough 206x13 needles to know which is better than another. I’m not the best person to answer this question, you’re better off poking around on forums that deal more heavily with actual sewing.


Is the 206 really "The Singer That Should Be Forgotten"?
Hans, like many people you're sending me a question seeking a factual answer to a matter that is rooted in opinion. You might as well ask me "Is France really a good place to live?"

The link you’ve provided is to the blog written by Ed L., a well-respected vintage sewing machine aficionado who founded the Vintage Singers group. I’ve never had the pleasure of corresponding with Ed, but I believe he would tell you the same thing I would: That a sewing machine becomes an intensely personal item to the user, and that there’s no accounting for taste. If you spend time around them you’ll find there’s a model you ought to hate that you simply love, and vice versa. Ed clearly states his reasons for why he dislikes the 206.

Another vintage sewing machine aficionado was the dearly departed Ray W., a longtime contributor to various sewing machine forums, and he has stated that the 206 was one of his favorite machines and his main machine for many years.

Whether or not the 206 should be forgotten by you is entirely up to you.

Reader Questions: Hans and the Singer 206, Part 1


Time to answer some reader questions. These photos here were sent to me by reader Hans in Chicago. As he writes,


In a thrift store, my wife bought this Singer model 206. Our six-year-old recently expressed interest in sewing and we were looking for a machine to get her started.

Hi Hans, I really like the 206 and own several. That being said, the 206 wouldn’t be my top choice to teach sewing to a child, for two reasons:

One, the zigzag adds a layer of complexity you could avoid with a straight-stitch model like the 15, 201, 99, 66 or 221.

Two, more significantly, the design of the 206 requires that the entire machine be tilted back on its cabinet-mounted hinges in order to access and change the bobbin. Some 206s are aluminum, rather than the heavier cast-iron, but even with an aluminum model, this process will likely not be easy for a six-year-old child. You’ll also have to ensure they don’t let the machine slam back down on their fingers.

From what I’ve read in the forums, many people teach children to sew using handcrank machines. If you go this route, I think the most economical route to go would be to acquire a cheap model 99 or Spartan and buy an aftermarket handcrank. Jenny at Sew-Classic sells them.

I should also mention that I’m not a skilled seamster and have no experience teaching sewing to either children or adults. If any readers have any experience in this area and can help Hans out with recommendations, please feel free to sound off in the comments.

More to come in Part 2.

Singer Featherweight Oval Cabinet


CABINETS


 These are photos of my cabinet.  Pictured in Nancy Johnson-Srebo's Featherweight book.   Gail

========================================
Subject: Adapting a Used Cabinet for a FW
From: Terry ragdoll

Although I do have one of the original FW tables, it is too large for my studio space so I adapted a used cabinet and just love it. I found an old Singer for $36 but it was the cabinet that caught my eye. Everything that isn't oak is mahogany to me so I guess this is mahogany. :-} It has one drawer to hold FW attachments, two boxes of bobbins and manual. My little parrot likes to get in it and play when I sew.

To adapt this for my FW, I simply set the FW into the existing hole cut
out for the old machine. I measured from the top of the bed of the FW to
the sewing surface of the cabinet and it was exactly the height of the
thickness of a 2x4. Not owning a table saw, I used a handsaw to cut two
lengths of 2x4, removed the FW, screwed the 2x4s to the metal bars down in
the hole (depending on what is IN the hole one could simply epoxy the 2x4s
in place), and then simply set the FW on top of the 2x4s.

There is a space to the right of the FW which nicely accomidates the 3-
prong plug. I moved my FW as far forward in the hole as possible so it is
flush with the top of the cabinet and I have a smooth sewing surface. There
is a 2" gap behind the machine where, if one had a scroll saw, one could cut a piece of wood to fit the space and it would fill in. Many modern sew.
mach. have a plastic insert to fill in this area on cabinets. My solution was to cut a piece of hard styrofoam (leftover from computer packing) to
wedge into the space and cover it with black, shiny electrical tape. It matches the finish on my FW, removes easily for machine cleaning, but stays
in place when sewing for a smooth, flat surface. You can't imagine how neat my FW looks in its little cabinet.

This cabinet's original machine has a wood curved cover so that the owner
could convert it to a "portable". One mistake I made was not to refinish
this cover when I refinished the cabinet so that it could cover the FW when
not in use. Many times I was going to give the old machine away or haul it
to the dump but that cover stopped me. After reading this digest I am
anxious to see if that ugly grey thing actually sews, what model it is, etc.

It has a boat bobbin and is electric. But that will be another day.

Hope this sends some of you looking for cabinets to convert. There are
plenty of junk machines sitting in shops that they can't give away so ask
yourself if the cabinet isn't worth the price. The stuff you usually find
in the cabinet drawers is always like a treasure hunt, too. Good luck!

The Complete “How to Re-wire a Potted Motor”


If you are arriving at this entry for the first time, this is a comprehensive guide on how to re-wire the potted motors found on vintage Singer 15-91 and 201-2 sewing machines. It is my attempt to walk someone with zero experience through the entire process.

For your convenience, here are links to all 20 entries in the series. This way you can bookmark this page as a Table of Contents and quickly get to the entry you need.

Part A: Skills Building


1: Wire, Wire Stripping and Wire Braiding
Learn about the tools and wiring basics you’ll need to know to re-wire a motor.


2: Tools & Materials Required for Soldering
Learn what equipment you'll need to complete basic wire soldering.


3: Learning to Solder
Learn and practice basic wire soldering.


4: How to Terminate Your Wires
Learn how to create connections for attaching wiring to power terminals.


5: Covering Wire Joints with Heat Shrink Tubing
Learn how to clean up exposed wiring.


6: The Underwriter's Knot
Learn how to tie wiring into a strain-relieving knot.


Part B: Motor Disassembly


7: Disconnecting the Motor Leads
Learn to detach your sewing machine’s power terminal and wiring.


8: Motor Housing Removal
Learn to take the motor off of your machine.


9: Grease Wick Removal
Learn how to remove those grease wicks and where to get replacements.


10: Motor Brush Removal
Learn how to take those motor brushes out and look for signs of motor trouble.


11: Armature & Worm Removal
Learn to remove two crucial parts of your motor.


12: Detaching the Field Core
Learn how to safely crack the motor open.


 Part C: Making Repairs


13: Cutting and Prepping the Motor Leads
Learn where to cut the bad wiring off.


14: Replacing the Motor Housing Grommet
Learn how to remove a cracked rubber grommet, where to get a new one, and how to put it in.


15: Soldering On New Motor Leads
Learn where and how to solder on the new wiring.


17 (Yes, this is out of sequence): Cleaning the Commutator
Learn how to clean off a crucial element of your motor.


Part D: Motor Re-assembly


16: Re-attaching the Field Core
Here we start putting the motor back together.


18 (Yes, this is out of sequence): Re-installing the Armature and Worm
Learn the tricks behind putting these two crucial parts of your motor back together.


19: Re-installing the Brushes and Grease Wicks
Learn to easily re-install these correctly.


20: Hooking It All Back Up
Here in the final step we finish up the wiring, run the motor in, and put it all back together.


[A caveat: I hope you'll be able to bring your potted motor back to life with new, safe wiring, as shown here. But please be aware that these steps are not an absolute guarantee of success, as a small percentage of motors may be completely burned out, which is currently beyond my capabilities.]